伺服器監控系統 - UptimeRobot + Hubot
前些日子因為伺服器有些不穩定,所以打算搞一個 Monitor System 來監控各個伺服器的 Accessibility,希望可以在伺服器壞掉發生後立刻收到通知,以短時間進行修復,降低損失。於是就串了 UptimeRobot + Hubot + PushBullet,在災害發生當下就可以收到手機、mail 通知。
這篇文章會提到:
一、UptimeRobot
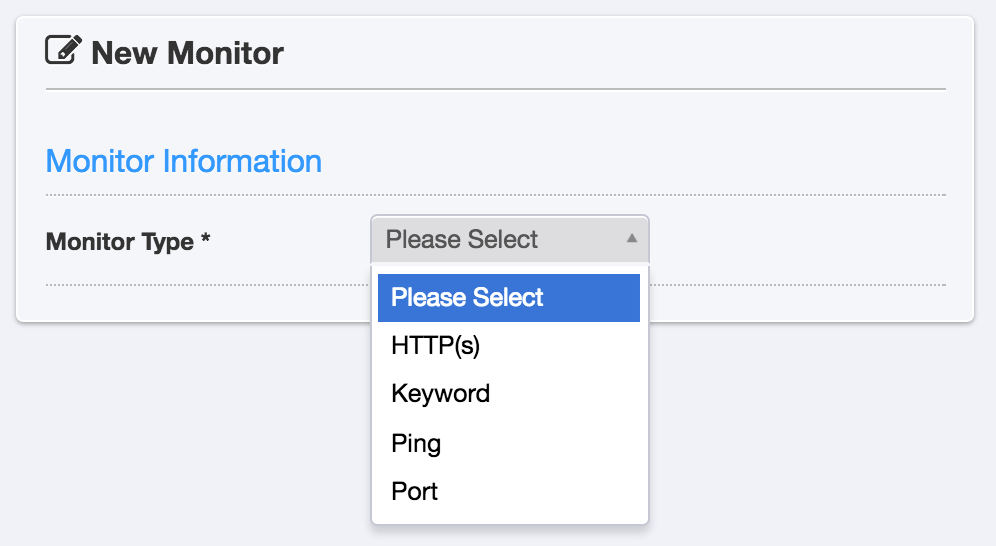
UptimeRobot 本身可以提供一些基本的監控方式,像是 HTTP(S)、PORT、PING、Keyword,普通應該 HTTP(S) + PING 就可以應付大部分的情況了。
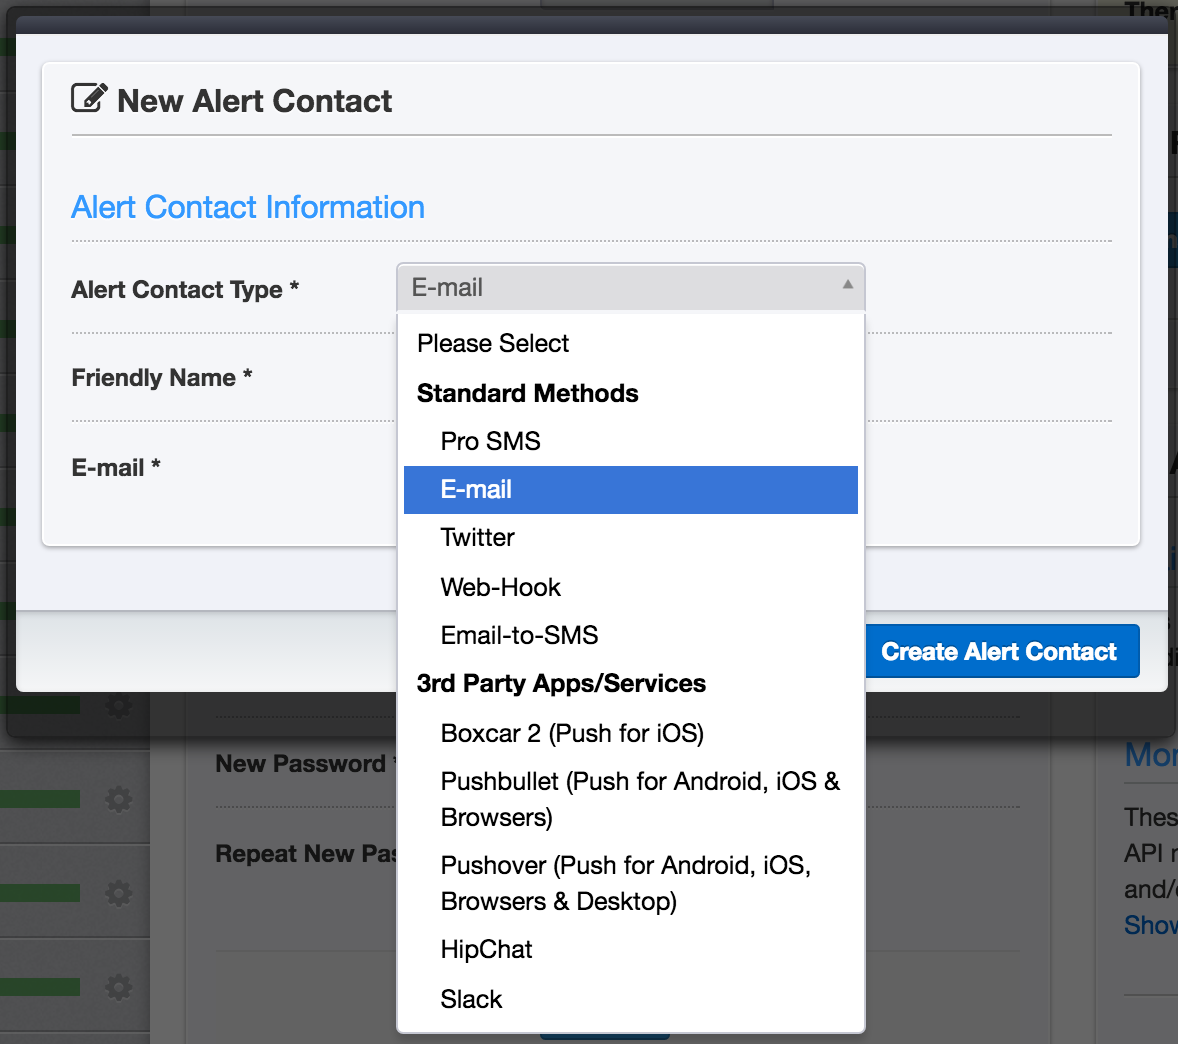
此外 UptimeRobot 通知的方式也很多元,有 Slack, Mail, PushBullet 等等,付費可以有簡訊。串 PushBullet 的部分是因為他可以送手機推播,其實就跟手機簡訊是一樣的功能了,而且 Pushbullet 還可以送 Chrome 的推播,支援多設備同時推送,我覺得非常方便。
以 HTTP(S) 來說,UptimeRobot 可以設定最短五分鐘的戳一次你的 Server (付費可以到一分鐘一次),如果是正常的 200 就算正常,4XX 或 5XX 就會判定為 Failed,於是就會觸發設定的通知。可以根據每隻 monitor 設定對應的通知。
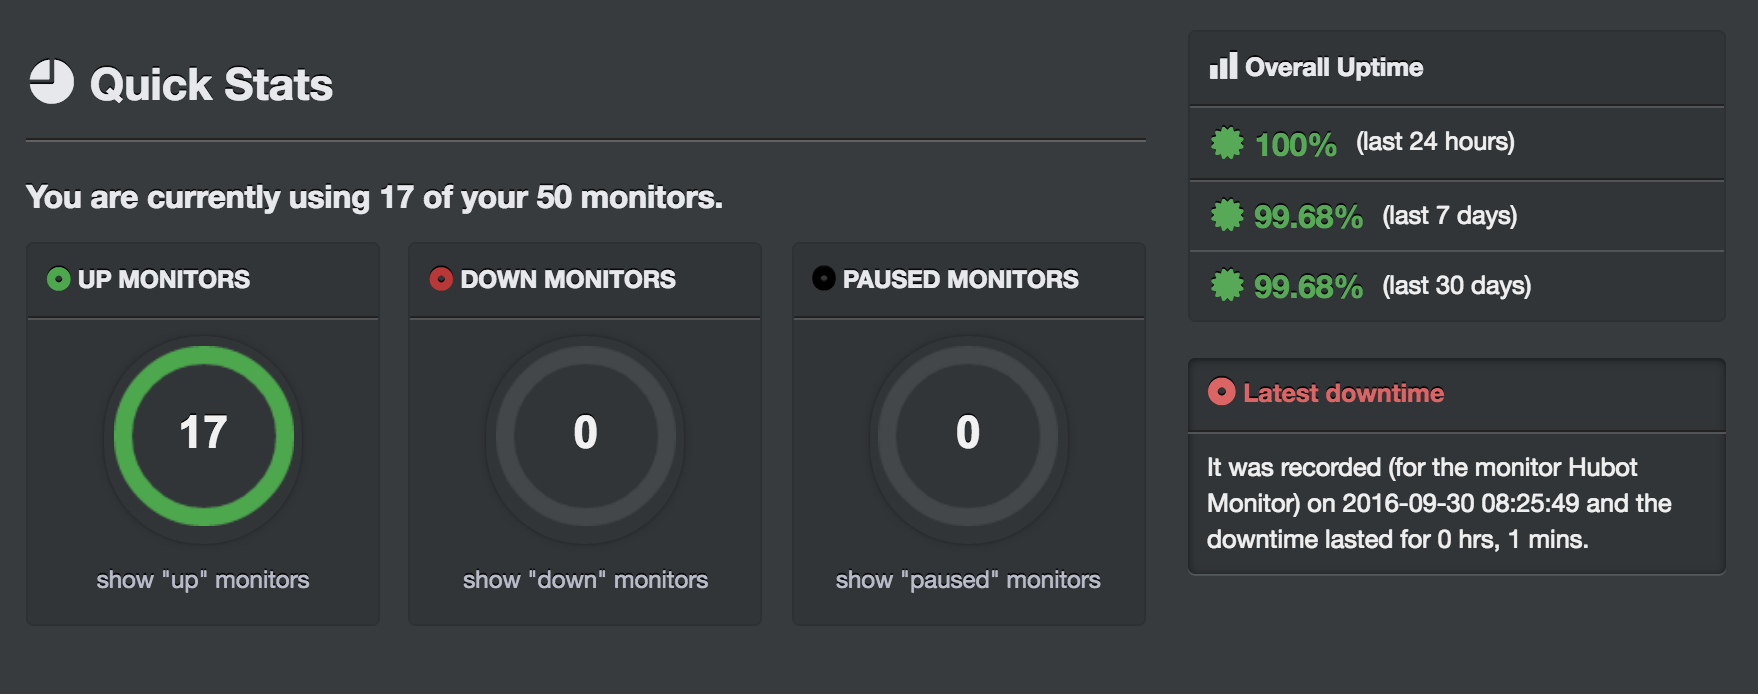
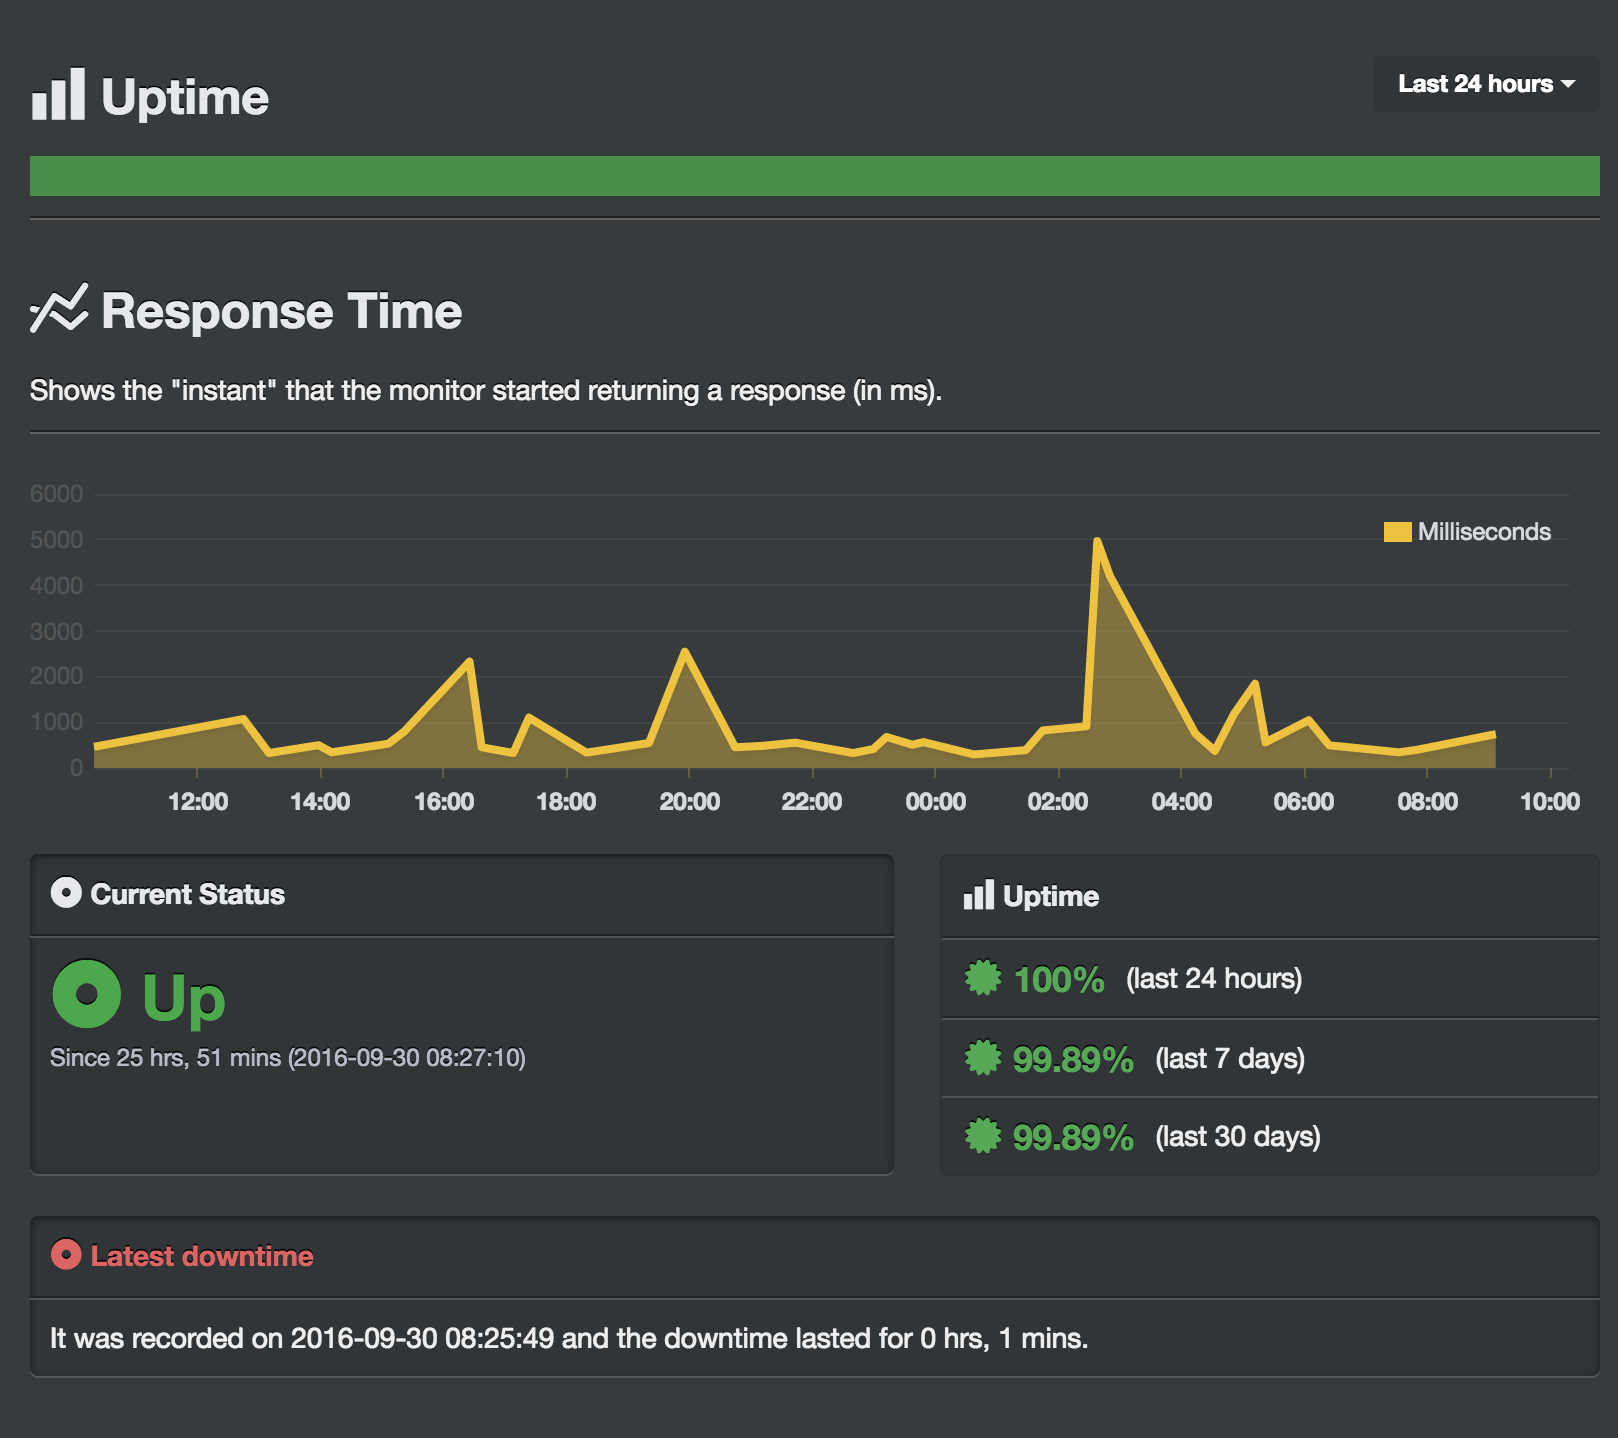
設定完成後 Dashboard 就可以看到 Server 們目前的狀況,也可以點進去看每隻 monitor 的細節
這部分的數據都是可以接 API 的,有時間 也可以串 Statuspage.io 方便大眾觀看。
二、監控非 Server 的程式
至於不是 Server 的程式 (ex. Hubot),我採用間接監控的方式。其他不能透過一般常見 Request 戳,或是需要更進一步 request & respond 確認的伺服器,也可以採用這種模式。
主要的邏輯是:在有 Public IP 的地方放個 Monitor Server,要被監控的程式需要定時去戳 Monitor Server,而第三方的 UptimeRobot 可以透過戳 Monitor Server 來間接監控。Monitor Server 只要做到如果有在一段時間內被戳,就回傳 200 OK,反之 404 Not Found 就好了。
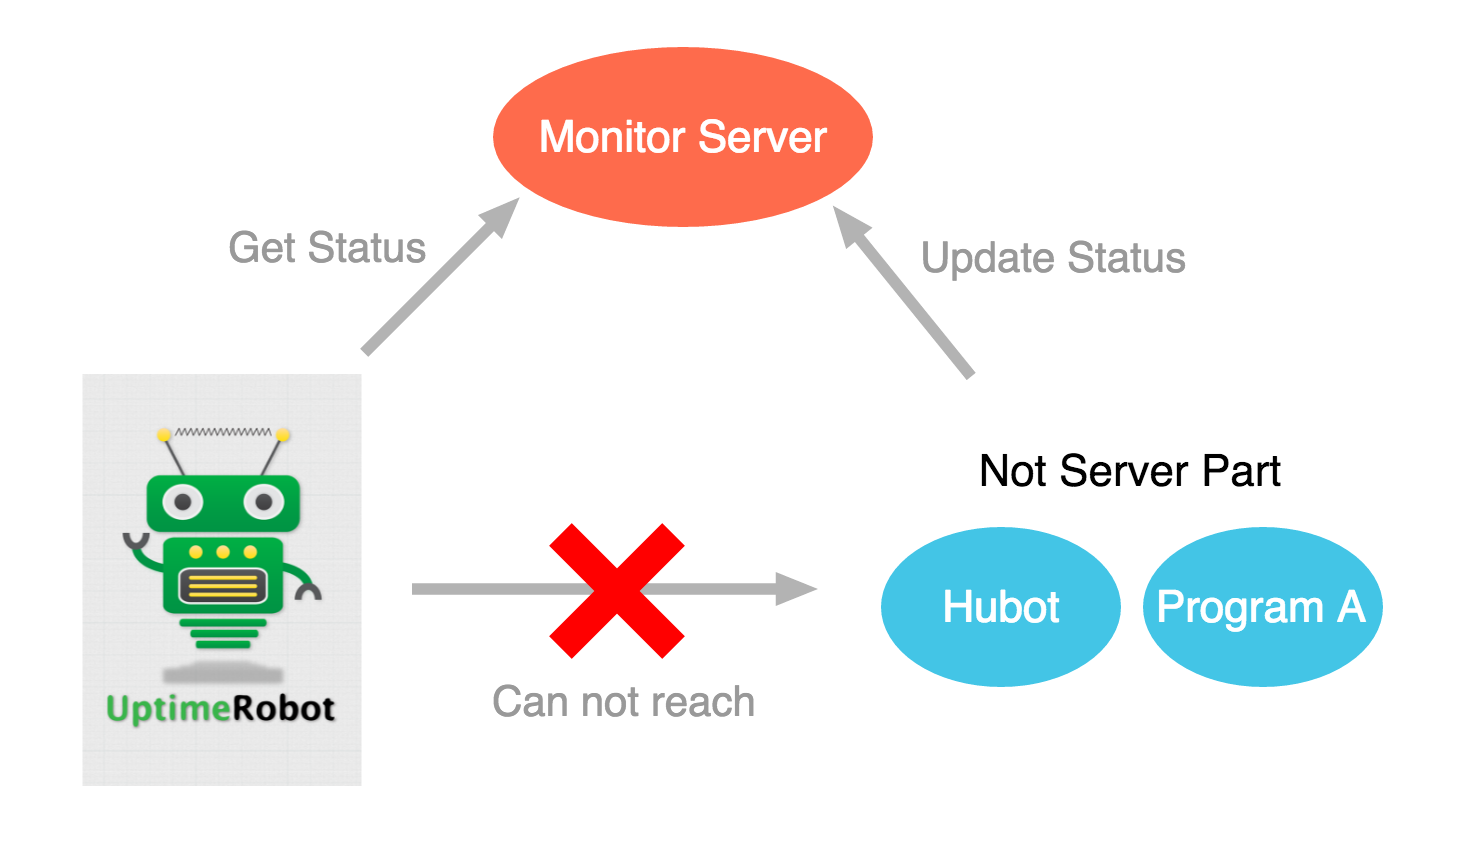
實作上也蠻簡單的,要注意的點是讓戳 Monitor Server 這件事要變得可識別,可以加個 MD5 之類的 signature 防止其他人戳,然後加個 SSL 吧,可以參考上一篇教學。
附上 Python Flask 範例程式們:
- 取得目前狀態 API
1 |
|
- 更新狀態 API
1 |
|
- 在每個 POST request 來時驗證 Signature,GET 的部分不用驗證
1 | def validate_request(): |
1 | def _verify_signature(): |
- 最後是透過
hmac和hashlib的函式庫算出 Signature 的部分
1 | import hmac |
如此就能驗證發送端是自己的程式,而不是其他人發的。
三、平行監控系統
平行監控系統的目的是要讓監控系統本身也可以容錯,如果只有 UptimeRobot 監控,那 UptimeRobot 掛掉的話,監控就失效了。
所以除了 UptimeRobot 之外,我還使用 Hubot 的 hubot-cronjob 去排排程,每分鐘定時監控伺服器 (甚至可以做到秒為單位,也可以更客製化)。

附上範例程式,可以放在 hubot 的 script 資料夾內
1 |
|
未來也打算多放幾家的 monitor 來做 (ex. Statuscake, Pingdom)。
不過回到頭來,預防勝於治療,除了這套 Monitor System 之外,伺服器應該是本身要夠強韌才對。想辦法讓伺服器的負載平衡夠強,靠得住不容易 Crash,才是根本之道啊!